Last Updated on July 5, 2021
In general, the weight distribution hitch is used for distributing the weight of your payload evenly. The weight-distribution hitch works using tension and adjustable spring bars for distributing your trailer’s tongue load to the trailer and vehicle axles.
The weight-distribution hitch offers so many benefits like even distribution of weight, eliminating risk, stable ride, better control, safer braking and so on. That’s why it is better to use a weight-distribution hitch. Having a weight-distribution hitch is not a solution always. You need to know how to use the hitch.
In this article, I will be talking about how you can use your weight-distribution hitch. Let’s get started.
Read More:
Quick Navigation
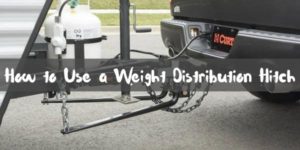
How to Use a Weight Distribution Hitch

Measuring the Height of Trailer and Vehicle
In the very first step, you have to park your trailer and vehicle on the level ground. Then you need to use the tongue jack of your trailer and level so that the trailer remains parallel with your ground.
After that, go through the measurement process and record your vehicle’s and trailer’s height. You will have to find out the difference between the land to your trailer couples and also the difference between the ground to your vehicles the bottom of the backward and onward bumpers.
Attaching the Hitch Head and WD Shank
After finding out the measurement, you will have to put your weight-distribution shank in your receiver tube. You have to make sure that you have inserted the shank fully into your trailer hitch receiver tube. Use pin and hitch clip for securing them.
Then, make your head assembly in its position on your adjustable tank. You will find the head assembly has raised in a way as the ball of the trailer is 1 to 3-inches higher than the height of the coupler. Then, you will have to take the help of one mounting ball at your assembly’s bottom for holding in its place. Make sure that you are not tightening the bolt with the help of a nut.
Adjusting the Head
Now, you have to set 2 washers on your adjustment rod. Then put the adjustment rod in the downcast hole of the head. You will have to do this by pivoting the head down. Some of the hitch distribution does not hold this feature. In this kind of case, you will not need to go through this step. For a clear understanding, you can check the instruction manual that comes with the hitch.
Then, on the shank, you need to head up in a mounting position. You will find it titled back slightly or vertical. In this case, you may have to remove or add washers to achieving an accurate angle.
After that, you have to put the next bolt in the upper hole into the head of your hitch and then fasten both of the bolts using a nut and washer. Make the bolt tighten in a way so that it has the ability to hold the head into its place.
Installing the Spring Bar and Couple Your Trailer
In this step, you will have to mount your spring bar on the head of your hitch. If you have not attached the chain of the spring bar yet, then you have to attach them first before you mount the bar. Now, simply rise your trailer coupler. Then back the vehicle you will be towing up to couple the trailer to the ball of your trailer.
Raising the Jack of Your Trailer
Now, uplift the point of coupling using your trailer with the coupler latched onto the trailer ball. You should find the coupler raised approximately 3-inches higher than the level surface.
Engaging the Hookup Bracket
After that, use the spring bar chain to find the brackets of the spring bar hookup on the frame of your trailer. Again, use the bolts for mounting those brackets into the frame of your trailer.
Now, you have to attach the chain of your spring bar with the brackets. Here, you have to ensure that both sides have the same vertical space along with the chain links number between the hookup brackets and spring bars. Then, with the help of the lift handle, pry the bracket into its locked position.
Adjusting the Hitch
Now, you have to bring the jack of your trailer back in order that the whole trailer’s weight is resting on your hitch. After that, go through the measurement again and find the difference between surface and onward and backward bumpers. The difference should be about 1/2-inch comparing with the actual measurement.
However, if you find distance changed drastically, then you can adjust the link number on the chains of your spring bar for increasing or decreasing tension. Adjusting the head unit tilt is also an option for you.
Tightening the Bolts
Finally, uncouple your trailer and also tighten all of the hardware according to the values given in the instruction manual.
The use of a weight-distribution hitch may vary from model to model. That’s why it is necessary to go through the instruction manual first.


I’m Daniel Galbreath, founder of OffRoadersWorld.
I spend my spare time writing on this website, OffRoaders World. I share my thoughts and reviews on different types of gears, share tips sometimes. This website is specially created and regularly updated basically to help other folks like me when I started to solve the various problems they face, specially when they go off-roading.
