Last Updated on July 5, 2021
It may happen that you need to move heavier things from one to another place. Which equipment you will pick to assist you? Probably you are thinking about bringing a trailer hitch.
The trailer hitch is used for pulling large or heavy items from one place to another place. Moving an object using a trailer hitch is very easy and handy. But, it can be dangerous if your trailer hitch is not installed properly. So, before going to use a trailer hitch, you have to secure it properly which means installing it in a proper way.
Whatever installing a trailer hitch is very and you can do it within a few minutes. In fact, it’s a DIY hack. You don’t need any help from any professional.
In this article, I will be describing the detailed procedure for installing your trailer hitch. So, invest here a few minutes. After going through my article you will be able to install your trailer hitch properly.
Related Resources:
- How to use weight distribution hitch
- The best adjustable hitch ball mount
- How to hitch a trailer – step by step guide
Quick Navigation
Easy Steps to Install a Trailer Hitch
Step-1: Going Through the Instruction Manual
You should start with going through the instruction manual properly that comes with your trailer hitch. You will find each and every relevant information there including some necessary precautions. You will get a rough overview of your installation like what to do and what not to do. If you don’t understand it, then don’t worry. I am here to help you out. Reading the manual will boost your confidence level up.
Step-2: Bring Necessary Tools
Then, your next task is to bring the tools that you will need while installing. The tools may vary depending on the model of your hitch. These tools are basic tools and you will find them in your toolbox. I am attaching a list of tools needed while installing your trailer hitch.
- Trailer hitch
- Work gloves
- Safety glasses
- work light
- Jack
- Wheel chocks (2)
- Torque wrench
- Ratchet
- Socket set
Step-3: Keep Wheel Chocks on Your Vehicles Front Wheels and Jack up the Vehicle
Now, you have to place the wheel chocks you gather on your vehicle’s front wheels. You may require to jack up your vehicle. It depends on the type of your hitch.
For most trailer hitch, jacking up your vehicle is not mandatory. But, it is recommended to jack up your vehicle. Because it will allow you to have some additional space underneath your vehicle to work easily. In this case, make sure that the emergency brake is activated so that your vehicle remains stable.
Step-4: Arrange a Work Light
It is always recommended to set up a work light while doing any automotive work, especially while working the underneath of your vehicle. Bring a light and set it in a way so that you can see everything clearly as you will have to deal with small nuts, bolts and other accessories while installation.
Step-5: Take off the Spare Tire
Now, you have to remove the spare tire if there is any underneath of your vehicle for setting up the hitch. You can remove the spare tire easily using a socket set and ratchet. Without it, you have to lower the tailpipe and exhaust now if your trailer demand. So, do it accordingly.
Step-6: Take off Plugs, Bolts and Other Parts as Specified
Well, there is some trailer hitch that will ask you to remove some bolts and rubber plugs while installation for mounting the hitch frame. On the other hand, some hitch may demand to remove or trim the small panels or heat shield. Again, there is some hitch that may ask for drilling into the frame.
However, your vehicle’s existing hardware may be used for bolting the trailer hitch into its place. If your hitch requires any other hardware, then it will come along the hitch. You will find it in the packet.
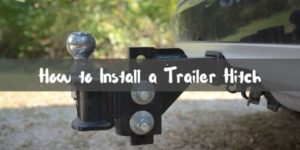
Step-7: Place the Hitch in its Position and Attach Hardware
Now, it’s time to keep your trailer hitch in its place and attach the necessary hardware. In this case, you may need to take help from anyone as your trailer hitch can be heavier, especially if you own a heavy-duty vehicle.
Whatsoever then you just have to make the nuts and bolts tighten so that they can hold your hitch in its place. Once you find that all of your bolts are attached, now you can move on to torquing.
Step-8: Tighten the Nuts and Bolts
You are almost done. A single step to follow. In this step, you have to torque the bolts to the values mentioned in the user manual of your hitch. Before that, you have to make sure that all of the bolts are placed in their position.
The torque amount depends on the bolt size. There are some hitches that require 150 foot-pounds of torques, whereas others require 100 foot-pounds. You need to have the appropriate tool to torque your hitch safely. With this, you are done with installing your trailer hitch. You are set to go now.
People also asked:

I’m Daniel Galbreath, founder of OffRoadersWorld.
I spend my spare time writing on this website, OffRoaders World. I share my thoughts and reviews on different types of gears, share tips sometimes. This website is specially created and regularly updated basically to help other folks like me when I started to solve the various problems they face, specially when they go off-roading.