Last Updated on July 16, 2021
During your tow trailing, it is very important to have a perfect towing set up for your stable and safe ride. With the right setup, you can get much more comfortable and can carry more loads at the end of your vehicle.
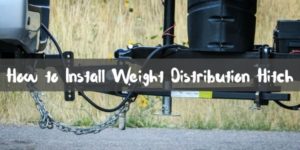
A weight distribution hitch is a system or a setup that gives you the criteria I have told you. With the use of this setup, the actual weight gets distributes through the axle. It doesn’t allow you to put the whole pressure on a certain point that can break your vehicle easily.
However, setting up such a thing seems to be easy. After reading this article, you will be able to set up your weight distribution hitch at the back of your garage. You don’t need a whole toolbox setup. I will be guiding you step by step through the whole procedure.
Before you start with setting up the weight distribution hitch, there are some fundamental things that you need to know like how does it work, what components it carries and what are precautions you need to follow while setting up the hitch. So, let’s talk about them first.
Quick Navigation
How does A Weight Distribution Hitch work?
Before knowing the mechanism of a weight-distribution hitch, you should know how towing works actually.
When you put a load or a weight at the end of your vehicle, the whole pulling force gets on a certain point which is connected at the chassis. It directly puts pressure on the rear axle to pull. Also, when the weight is more than the weight of your rear axle portion of the puller, the rear part gets lower by the natural law of gravity. When the rear portion is more down, the puller’s front part gets light and lifted from the ground.
In this case, driving safe is tough, and on a rough road, the suspension doesn’t work well, and controlling gets difficult. The result indicates an accident which you surely don’t want to face.
But when you install a weight-distribution hitch, the weight gets divided into two parts at first. So, the connection point becomes various, and the whole weight divides. Also, after distributing the weight, the rear part of your puller vehicle never carries full loads at a point. So uplifting the first part is impossible and smooth controlling and the better braking system ensures. The possibilities of swaying away from the road get reduced.
What components a weight-distribution hitch carries?
There is a total of five spare components required to operate while installing a weight-distribution hitch.
1. At first, a trailer hitch receiver is required to connect the puller vehicle. It is attached to the rear body of puller vehicles. It receives the frame of the hitch when you install the second part.
2. The weight distribution shank is the second part that holds the trailer hitch receiver with the trailer head assembly. It is adjustable with height and sizes according to the types of load or trailer. It slides into the trailer hitch receiver and holds the maximum weight.
3. Weight distribution head assembly is the most essential and critical point of a weight-distribution hitch. It connects the Weight distribution shank and the spring bars. The distributed weights get connected here by this part. When you attach a trailer, you attach to this part. The first two parts are permanently attached to your puller. There are many types of weight distribution head assembly for different mounts like hitch ball attachment, sway control attachments, etc.
4. Spring bars reduce the jerks of rough roads. It also reduces the stress when you are turning aside. It absorbs the extra energy and reduces it through itself. Without a spring bar, the rear axle may take much stress and break down on the road.
5. Lastly, the frame brackets are attached to the trailer body. It holds the spring bars in place. It also has some variations like spring control frame brackets, sway control frame brackets, and chain system frame brackets.
Precautions you need to follow before installing:
- The brake of trailer surge couplers are not compatible with hitches that have a friction sway control attach bar. If your trailer has coupler of surge brake, contact your distributor before installing a weight-distribution hitch.
- Check the owner’s manual for detailed guidance about how to set up a weight-distribution hitch if the vehicle you are towing holds an automatic load-leveling system or air shock springs or
- In an ideal situation, the trailer will be fully loaded. If you’re going on a drive, make sure the vehicle and trailer are properly loaded; that way, you’ll know the weight you’re towing will be equally spread.
Steps for Setting Up a Weight Distribution Hitch
Step-1:
At first. You need to find a smooth and flat surface or ground. Park the two vehicles in the position of a straight line to attach them with a weight-distribution hitch. If the trailer is not leveled with towing vehicle, use a lifting jack and make a level. Then check both heights with measurement tape or see the bubble indicator of your lifting jack.
Step-2:
Then, attach the shank. Remember the parts I have described earlier? You can attach a hitch ball to hold up the shank. Keep in mind that you cannot use a random hitch ball. Read the manual before purchasing your one.
You may buy an adjustable hitch bar, also known as a shank, to fit your trailer coupler height specifications. And, depending on the height of the trailer, position the hitch bar further into receiving channel of your towing vehicle. You have the option of using a drop or a raise configuration. Safeguard the hitch bar with a pin and clip.
Step-3:
Now, you need to adjust the head. Use washers (because there is a little space left intentionally; thus, you can put it quickly) and bolts to correctly adjust the weight distribution head’s height. Before installing the spring, it is essential to measure the height once again. Use which hole levels the connection. Then attach the second bolt with washers and make it sealed.
Step-4:
Your next task is to attach the springs. They’re the most important part of a weight-distribution hitch, and you’ll be happy to know that respring bars are the highest rated per class in the industry. Since there is no easy right or wrong, you should place any one on either foot. Attach the chains to the bars using the U bolts, flat washers, and locknuts.
Place the bottom knob of the trunnion into the lower socket of the ball mount and slide the knob into the top of the ball mount. Then push the bar so that it is parallel to the trailer frame’s side.
After which, by sliding the ball mount as required, change the bar to match the height. While using a top-mounted coupler, the ball should be vertical and angled slightly towards the trailer.
Step-5:
Now you use the tongue jack to increase the coupler height enough for the ball (to pass under it for the initial connection). Back up the towing vehicle until the hitch ball is in place with the coupler. After that, reduce the coupler height onto the ball until it clamps. Adjust the spring bars, and the bars and chains are now in operation.
Step-6:
Finally, the snap-up brackets should be mounted on the trailer’s base. You choose to place it so that the chain from the spring bar passes straight up and down and ties exactly in the middle on the bracket where you mount it. If you’ve found the correct spot, tighten the bracket by rotating the twisted bolt until it makes contact with the baseplate.
Tighten it another quarter turn after that, but be careful not to overtighten; be sure the bracket is positioned directly on the baseplate with both the top and sides in solid contact.
Step-7:
Lastly, with the help of a coupler lock, use the trailer jack to raise the trailer tongue. Remove as much weight as possible of the back tow vehicle. Lower the snap-up bracket’s shackles until it is perpendicular to the surface.
After this, pick up the chain and slip the nearest connection over the hook. Then slip the snap-up racket lift handle over the shackles to lock it in place. After then raise it until it passes over the core, and slide the safety pin through the narrow passage.
Now repeat the same procedure for the other side. In both ends, double-check that the U-bolt and the hook have the same number of ties.
So that’s it. You have done it.
Recommended Resources
- Where to find the best hanging hitch bike rack
- How to find out the right enclosed hitch cargo carrier
- Jeep Wrangler hitch bike rack list
- Pickup Truck hitch bike rack list
- EAZ Lift weight distribution hitches

I’m Daniel Galbreath, founder of OffRoadersWorld.
I spend my spare time writing on this website, OffRoaders World. I share my thoughts and reviews on different types of gears, share tips sometimes. This website is specially created and regularly updated basically to help other folks like me when I started to solve the various problems they face, specially when they go off-roading.